If you have fast internet with unlimited data plan then you probably don't know the pain of the slower side of the internet. Yes, it's painful, frustrating and challenging having a limited internet. Be it apps updating unnecessary or windows doing unstoppable update it's real pain to fell your internet being used and not being able to control it. Having to use a slow DSL myself, I did search the whole google for the solution and finally found that works well.
Showing posts with label Softwares. Show all posts
If you have fast internet with unlimited data plan then you probably don't know the pain of the slower side of the internet. Yes, it's painful, frustrating and challenging having a limited internet. Be it apps updating unnecessary or windows doing unstoppable update it's real pain to fell your internet being used and not being able to control it. Having to use a slow DSL myself, I did search the whole google for the solution and finally found that works well.
This is not a new problem that we are in a limited bandwidth. I myself have to limit my use because I use mobile broadband in PC. But there are various programs in PC that don't understand us and secretly update themselves. SO this is a simple post to detect them.
Windows 8 has similar inbuilt monitor for monitoring what program is using our internet but with less feature and windows 7 doesn't have it at all. SO the software which I am talking about is called Netbalancer. This is a awesome software with cool layout and features like tray stats window. But the thing is that its not free. I don't like to do this but as all mentioned software in this blog is no paid so I have to give you a patch for patching trial version of this software to full version. But I am absolutely not supporting piracy, hacking or cracking. This software shows what data is downloaded and uploaded by any process. How much internet is any process eating, etc.
Some screenshots of my personal use of this software....
NetBalancer
Windows 8 has similar inbuilt monitor for monitoring what program is using our internet but with less feature and windows 7 doesn't have it at all. SO the software which I am talking about is called Netbalancer. This is a awesome software with cool layout and features like tray stats window. But the thing is that its not free. I don't like to do this but as all mentioned software in this blog is no paid so I have to give you a patch for patching trial version of this software to full version. But I am absolutely not supporting piracy, hacking or cracking. This software shows what data is downloaded and uploaded by any process. How much internet is any process eating, etc.
Some screenshots of my personal use of this software....
![]() |
| Main window |
![]() | |
| Hover mouse window |
![]() |
| Traffic window and tray stat monitor |
Some feature of this software are:
i) Traffic window and graphical representaion
ii) User friendly
iii) Process explorer
iv) Bandwidth allocator for all process
v) Traffic rule creation
vi) Internet blocker, etc
These are few features I use. I don't even know what more does it have.
SO, here are the downloads:
i) Trial version of Netbalancer(No full version): https://netbalancer.com/downloads/NetBalancerSetup.exe
PDF stands for portable document. All the E-Books are written in this format but it is not editable without the correct software like Adobe Acrobat Creator. But this software is not always available. MS Word is one of the most common document creator or reader used in most of the computers. So, this is a very simple software that converts ".pdf" file into the ".doc" of the MS Word. There are many other softwares in the internet for the same purpose which also performs vice-versa but this is mine recommendation because it is very very lite utility and very very easy to use. So, they are easy steps to be followed. Just open the program, choose the pdf file then choose what type of doc file you want. Either wordpad one or MS Word one. You can also so some other advance settings like choosing fonts and other things.

NOTE: YOU WILL NOT GET THE EXACT DESIGN AS THE PDF FILE IN DOC FILE BECAUSE OF THE LACK OF DESIGN ELEMENTS IN DOC.
Download pdf to word converter:
This is a wonderful software for auto shutdown or any other shutdown operations. This software is WinMend Auto Shutdown v1.4.0
You can also change the layout color. Choose the shutdown type and the countdown or schedule. After starting the task the program will minimize itself in taskbar.
![]() |
| Color change option |
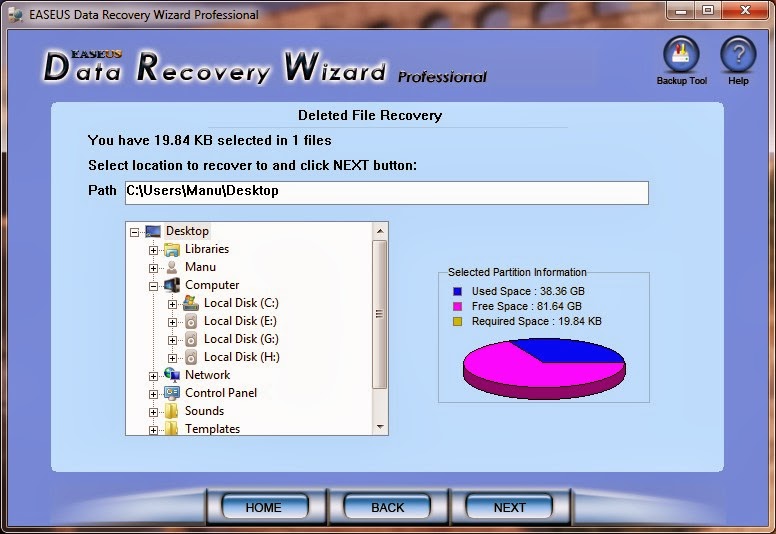
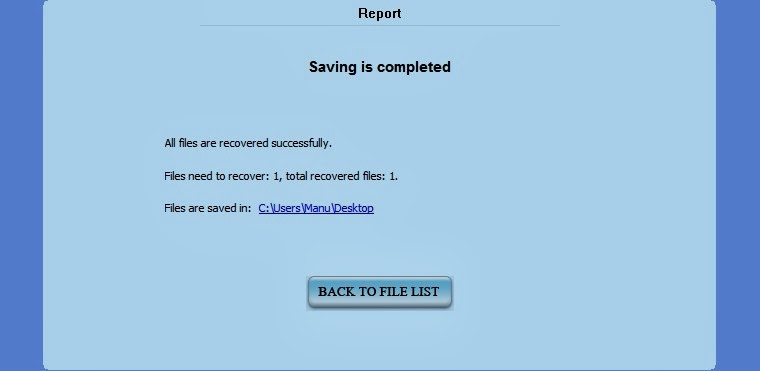
This is a very common mistake done by we computer users. We may mistakenly format wrong partion or mistakenly permanently delete files. But formatting or deleting doesn't mean completely erasing the history or origin of the file. There are many softwares for this process but the one I am preferring is well known Easeus Data Eecovery Wizard pro. This is a paid software and its trial version only allows 1GB recovery but the download link I am providing is full software download. This software is good but complete format recovering takes time. The more fast PC like one with windows i5 or i7 or quad core the more fast the recovery. I cannot guarantee you all files' recovery but most of it will. It also depends on your hard disk. Delete recovery doesn't take much time at all but complete recovery will. You can also recover files from the deleted partion from Partion Recovery. The below is the process of use and a example of recovery which is 100% legit.
I have selected Deleted File Recovery then choosed all file type then selected the partion. In this case my file was in G:
Now just click on next and then wait.
Now select the partion then select the files to recover then select next.
Choose location to save the file.


And here we go, recovered successfully.
Download it 4shared link:
There are many tricks available in the internet for this without using any software but most of them don't work at all. This 3rd party software work 100% in Windows 7 and Windows 8(May work in win xp).
Installation:
i. Just open the downloaded file as an administrator then it will automatically install.
ii. Select the folder and rest you know all. :)
iii. You can also change the color of the names of the folder.
iv. To uninstall just click on uninstall.
![]() |
| Test use |
Note: This software add a desktop.ini in the folder you customize. You can hide it.
![]() |
| Customized |
Download it:
Windows commonly only provide the folder icon of yellow color. Its just old same yellow color folder every time. But folder colourizer is a software for changing the window's folder color. You can choose your own color and add color in the preset.
Download it from here.
![]() |
| Example of colourized folders. |
Its very easy to use. Just download and install it(you may need to run setup as a administrator). Now right click the folder you want to customize then click on Colorize! then choose the preset color or choose pick your own color via Colors... . To restore to default folder icon simply click on Restore Original Color button. Note that it is like icon change so you will not see the folder as a book with some highlight in it as usual.
![]() |
| How to colourize? |
![]() |
| Colors picking and editing |
Download it:
I created this post
because many people were searching about the methods of recording the screen.
Many of us want to make a screen capture for any tutorial, you tube,
project or anything but many don't know the proper software for recording
screen. It is possible via VLC media player also but it is really
disappointing. Yes, you can search about this in the google but you will
get many many results which may puzzle you. And yes they will charge you for
the software. But at this blog nothing is paid so I am going to say you the
very good softwares that will record your screen easily. The download files are
default setup and crack. FYI if you din't know about the crack then just
understand that cracked don't mean lag or half software. Crack means hack. :D
OK, Following are the
two softwares that is very good at its work i.e. screen record.
1. Hypercam 3
This is a very good
software to record the windows screen. It maybe a little old but it is very
good. I have personally used it and I am satisfied with it. If you really want
to record screen then this maybe the best choice for you. This software has
some features like sticky note, pause, screenshot, full screen record, manual
region record, window record, etc. Its control button automatically minimize
into task bar after recording starts.
![]() |
| Test choosing windows for record (not recorded yet) |
| Download methode (Skip if you know): |
1. Click on downloading
link and it will take you to 4shared.
2. Click on download.
3. Then download button
in right side and choose your any social site id.
OR
1. Download how you download regularly via 4shared.
![]() |
| Playing my manual region recorded file |
Playing
my manual region recording
|
Installation:
1. Unpack archive.
2. Install the
hypercam3.
3. Copy the crack and
then paste(replace) it in hypercam3 installation folder.
4. All done.
AFTER CRACKING YOU WILL
HAVE UNLIMITED LICENSE.
Tip: For better FPS do
not record via full screen mode. Better record via manual region mode.
2. FRAPS 3.5.9
This is a very good
software, actually best for game recording. The record output is awesome. FPS
is very very good but the output size is very large. You can search in google
for the methods of compressing HD video file. This software provides features
like manual FPS control, FPS moniter in game and desktop, overlay position
modifier, screen capture, game capture, etc. You can choose to record the PC
sound or not. This is very good software for gaming as well as desktop record.
This is a paid software but the download link I have provided is cracked file.
Installation:
1. Unpack archive.
2. Install the FRAPS
3. Copy the crack and
then paste(replace) it in FRAPS installation folder(default: C:/Fraps/).
4. All done.
HAPPY MODDING
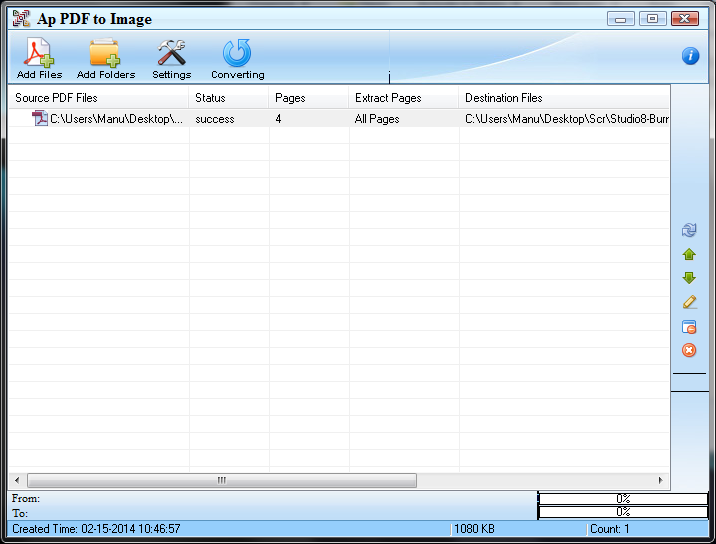
It is very easy to convert .pdf file into image with right software. You can do it manually but it will take your time. Maybe hours. Ap pdf to image converter is a paid software that convert the pages of the .pdf file into images. 1 image per page. This software is very easy to use and I have provided the serial key too. So, activated software will not give the trial watermark in the produced image.
Download the software from here.
1. Download and install the software from the above link.
2. Open the program and copy-paste the serial number from the attached txt or archive comment.
4. All done, now go to your folder with the .pdf file and you can see the converted images.
There are two ways directly to choose for changing Windows 7 log on screen changer :
i. Manual screen change.
ii. Using 3rd party software.
Manual screen changing methode:
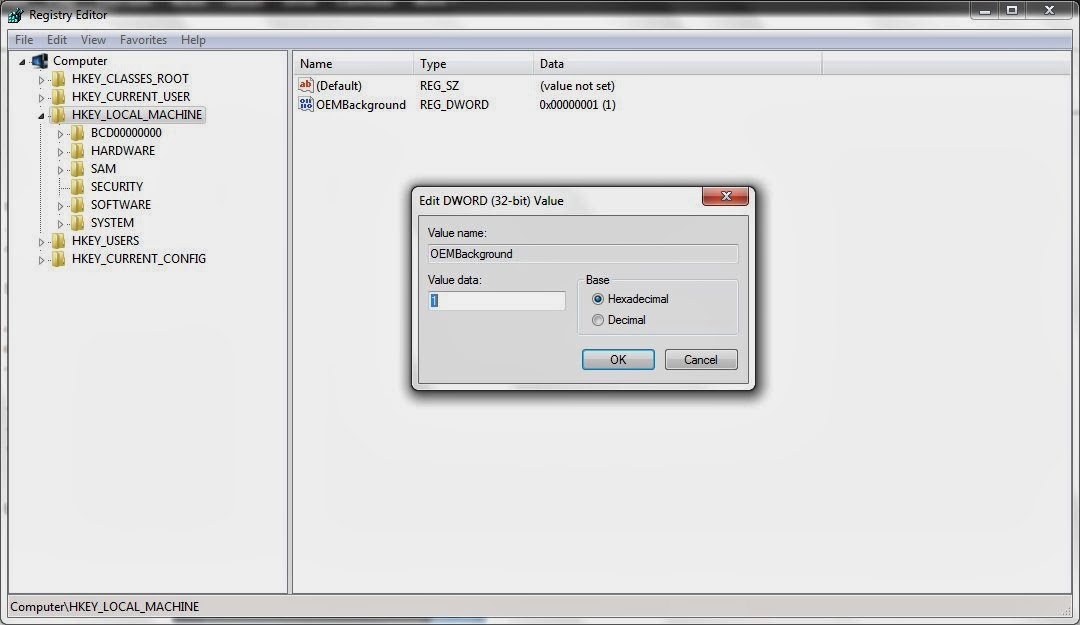
i. Type Regedit in your start menu.
ii. Now click on HKEY_LOCAL_MACHINE and fine " OEMBackground".
iii. If you found it then double click it then change the value to 1 from 0.
iv. If you didn't found it then add new DWORD value and name it OEMBackground and change its value to 1 from 0.
vi. Now go to C://windows/system32/oobe/ and create a folder and name it info.
vii. Now copy the desired image which is less than 245kb to this folder and name it defaultbackground.jpg.
viii. All done.
Using 3rd party software:
I recommend you this methode because it is easy and very effective.
i. Download Windows 7 logon background changer from here. Download it with your social site id.
ii. Now open it from start menu or from its installation directory.
iii. Browse for your desired image or choose from default custom image. You can choose images of any size.
iv. All done.
NOTE: THIS SOFTWARE MAY NOT WORK IN WINDOWS 7 PROFESSIONAL.
i. Manual screen change.
ii. Using 3rd party software.
Manual screen changing methode:
i. Type Regedit in your start menu.
ii. Now click on HKEY_LOCAL_MACHINE and fine " OEMBackground".
iii. If you found it then double click it then change the value to 1 from 0.
iv. If you didn't found it then add new DWORD value and name it OEMBackground and change its value to 1 from 0.
vi. Now go to C://windows/system32/oobe/ and create a folder and name it info. vii. Now copy the desired image which is less than 245kb to this folder and name it defaultbackground.jpg.
viii. All done.
Using 3rd party software:
I recommend you this methode because it is easy and very effective.
i. Download Windows 7 logon background changer from here. Download it with your social site id.
ii. Now open it from start menu or from its installation directory.
iii. Browse for your desired image or choose from default custom image. You can choose images of any size.
iv. All done.
NOTE: THIS SOFTWARE MAY NOT WORK IN WINDOWS 7 PROFESSIONAL.
Hi, today I am going to teach you a way to make a bootable USB drive. Actually there are many software that can do this job and there are many tutorial in YouTube about this topic but I am going to share mine with you. Ok follow the following steps,
1. Software you need:
i. Universal USB Installer, Get it from here.
ii. Img Burn v2.5.8, Get it from here. Softpedia mirror. For latest version please google it.
2. Things you need to do:
i. You need to have the copy of the OS dvd because we have to create bootable ISO.
ii. You should have a USB drive at least of 4 GB because most of the latest OS are nearly or more than 4 GB. If your OS setup files is less than 4 GB then use USB drive according to it.
3. Lets start:
i. First download IMG burn and install it. You can use your own custom software if you know how to create bootable image file from them.
ii. Download pendrivelinux.com's Universal USB Installer. You don't need to install it.
iii. Now open installed IMG burn. Here I am using a little older version but they are similar.
iv. Now click on Create image file from files/folder and locate your copy of OS folder. Here I am going to use my Windows 7 ultimate. Remember the folder you selected must have exact f files like in DVD.
vi. Now click on Advance tab and Bootable Disc.
vii. Now tick on Make Image Bootable option.
viii. Now click on the browse button(one with folder and magnifying glass) and locate efsboot in the boot folder in OS's folder(the folder which you have selected above in step iv.
ix. Now chage Sectors To Load to 8 if the OS which you are installing is Win. 7 or 8 and if it is Win XP and similar then leave it 4 itself. I am installing Win 7 so I changed it to 8.
x. Now build the image by clicking at the button in bottom left of the program and locate where you want to save the image and name it and click on save. In the middle of building process, click yes to all options asked. Rename UDF if you want to.
xi. Now after a short time(maybe a minute) you will receive notification that the image is successfully created.
xii. Now exit Img Burn and plug in your USB drive then open Universal USB Installer. Click on I agree and in step 1 choose the type of OS you are making bootable in USB. Here mine is Windows 7 so, I have selected Windows 7 Installer.
xiii. Now in step 2 click on browse .ISO and open .ISO image which you have saved just before.
xiv. Now in step 3 select your USB by its drive letter.Here mine is J:/. For better performance format it by ticking on format option just beside.
xv. Now click on creare and after the process complete the program will automatically make your USB bootable.
NOW PUT YOUR USB IN THE COMPUTER WHERE YOU WANT TO INSTALL THE OS IN YOUR USB AND BOOT FROM USB BY SELECTING YOUR USB DRIVE AS BOOT DEVICE OR CHANGING USB BOOT PRIORITY TO NO. 1 AFTER BOOTING THE INSTALLING OF OS STARTS.
Happy Modding.
Previous PostOlder Posts
Home


.jpg)